 |
So... I don't know about you, but I've got a 20-pound turkey carcass burning a hole in my fridge right now. Well, not literally, but you know ... it's not getting any younger, it's not getting any fresher, and it's not getting any better looking. It's time to turn its cold unappetizing hide into a several-months supply of healthy, yummy homemade stock. Not a bad makeover, if you ask me.
I remember when I first read an article in a cooking magazine about homemade stock. I'm not sure what the "recipe" was anymore, but what I took away is that making stock should be fun, easy, and, ultimately, do-able. It's been about 10 years since I read that piece, and I've been making my own beef and chicken stock ever since. I don't make it all the time, though, and--gasp!! I sometimes let a perfectly good carcass or package of soup bones go to waste. And--double gasp!!--I do still use pricey store-bought stock when I run out of homemade. However, when I do take the minimal time and effort to make stock, I'm always glad I did.
Here's how I make stock. There's no hard and fast measurements; just guidelines and suggestions. Use what's on hand in your pantry, fridge, or garden.
Guidelines for Chicken, Beef, or Turkey Stock
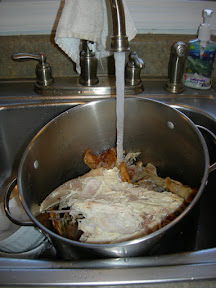
1. Toss the lovely carcass (or beef soup bones) into a big old pot and put in enough water to cover it well.
 |
2. Add in the goodies--a carrot or two; an onion, peel-on; a celery stalk, even better with the leaves; a few fresh garlic cloves; a handful or so of whole peppercorns; some sprigs of fresh parsley. That's it. All you need to do is rinse the veggies. They don't need to be chopped; toss 'em in whole.
 |
3. Bring to a boil; then reduce heat to low and simmer a good hour or two, until the vegetables, seasonings, meat, and bones begin to imbue the liquid with flavor.
 |
4. Strain into a large bowl, in batches. (If you make a big pot, this will take several times!) And, then portion out into plastic containers, or even ziploc bags, a batch at a time. I often measure out 14-ounce portions (because this is the size that most canned stocks come in and recipes often call for that amount).
 |
5. Freeze.
While no one seems to agree on the exact amount of time frozen stock stays fresh, I'd say use it within 6 months. For me, personally, I usually find it's gone within three months or so in the summer when I cook less soup and big meals, and even quicker in fall and winter when I seem to need it more.
But, lest we go off and start dreaming of hand-crafted bisques and broths, let's evaluate how DIY Mom-friendly homemade stock is.
Does it meet the criteria?
It must be affordable, it must be simple, it must be good.
$$$
For me, the cost is really zero. The bones or carcass would just be thrown away, and the herbs and/or veggies are literally whatever I have around. In fact, I usually feel good about using up some bottom-of-the-hydrator-pan carrots and onions that might have just been destined for the compost heap in another week or so.
Time
Throwing the stock together takes me five minutes or less and most of that time is spent just rounding up ingredients. It does take the 1-2 hrs. simmering on the stove though, but during that time you can pretty much forget about it and enjoy the mouth-watering aroma. To me, the largest investment of time is the straining and portioning.
Payoff
Because I had a large turkey carcass today, I got tons of stock for nothing. I bagged a massive total of 205 ounces of stock. You'd have to buy more than 14 of those store-bought cans to get that much. While the savings comes up to around $7 or so, for me, the biggest payoff is the fact that it's tasty and healthy. No sodium (you salt your recipes to taste after you add your homemade stock), no MSG, and no additives. YUM!
1 comment:
Hey DIY MOM! Sounds great! I made turkey stock once and was very glad I did. What's next on your agenda?
Post a Comment